


Export Input and Output Data to Excel
Traditionally, engineers copy and paste values from the Output into Excel. Instead, use the Excel Export Manager. Available from the File menu and main toolbar, the Excel Export Manager defines the data to be exported and where to place it.

Figure 1 - The Excel Export Manager
A new item to be exported can be created by clicking New. Each item has several fields to configure as described below.
| Apply to Export | Include the item in the export |
| Export Type | Type of data being exported - Single Value, Column, Row, Table, Graph, Other |
| Source | Which part of the Output the data is coming from |
| Object | The particular object to export. If Column or Table is selected, ALL objects will be exported |
| Parameter | The particular parameter to export. If Row, Table, or Graph are selected, ALL parameters will be exported |
| Units | The unit to use when exporting the value |
| Excel Sheet | The Excel Sheet to export this item to |
| Excel Starting/Ending Cell | What cell(s) to export the data to. Only the starting cell is editable - the ending cell is automatically calculated |
| Header | Include row/column headers |
| Units | Include unit text |
| Add Excel Comments | Create a comment on the Excel cell with a summary of the cell's contents. This is useful to keep track of complex exports |
For this example, we will use an Export Type of Single Value for the three requested parameters.
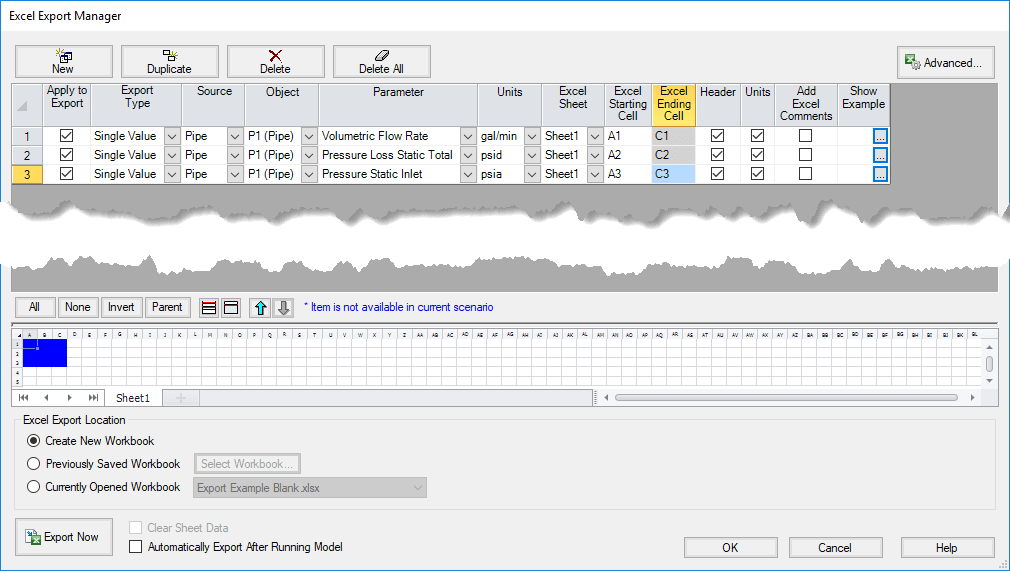
Figure 2 -Simple Model Excel Export Manager Settings
If the model has been successfully run, we can now export directly to a new Excel Workbook by selecting Create New Workbook and clicking Export Now.
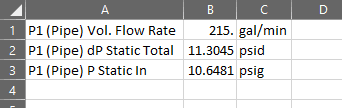
Figure 3 - Results of the Simple Export
A summary of what was done is displayed and the data is in Excel in the desired locations.
This is a lot of work for copying a couple of cells into Excel – the true power of the Excel Export Manager is shown with a more complex model.
A Complex Example
Copying and arranging data manually quickly becomes time-consuming and tedious. The model below (built with AFT Fathom 10's new Isometric Grid!) controls the distribution of a fluid to several outlets. The physical system contains complex non-fluid processes - the engineers need to do their own calculations with the hydraulic results from AFT Fathom as some controlling parameters.
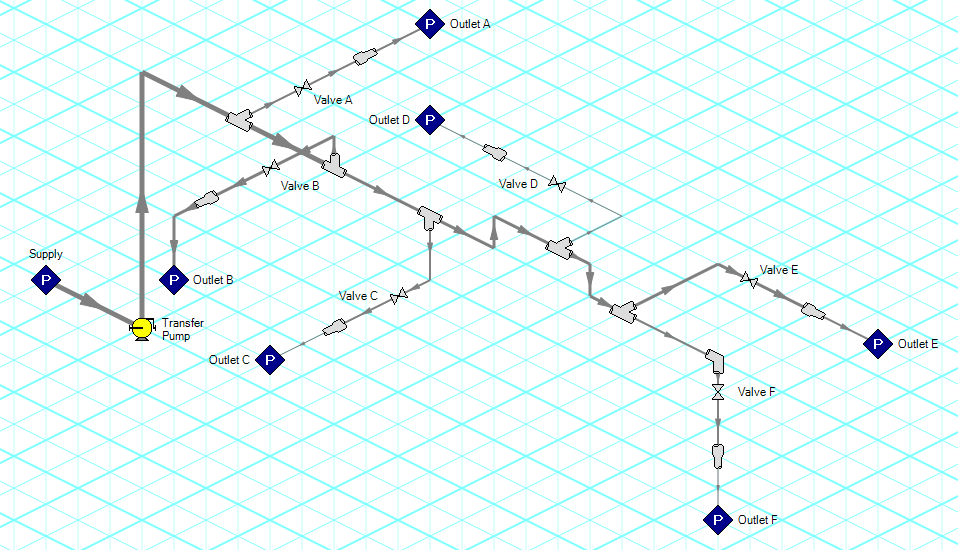
Figure 4 - A More Complex Model
It is desired to produce a report that contains only the critical information:
- Basic model and fluid information
- Volumetric flow at each outlet
- Loss factor at each valve
- The process efficiency - to be calculated with the AFT Fathom results
- Pump flow, head, % of BEP, and power
- Graph of Pressure, Temperature and Velocity along the main header
Setting items to be exported with the Excel Export Manager's New button can be somewhat tedious. To make things easier, you can add items directly from the Output by right-clicking on a cell or header.
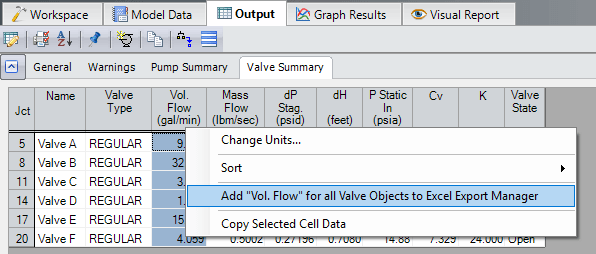
Figure 5- Right-clicking on a header allows that column to be added directly to the Excel Export Manager
Let's add some items directly from the output:
- Volumetric Flow Rate from the Valve Summary
- K Factor from the Valve Summary
- The entire Pump Summary (right-click the upper-left header cell labeled "Jct")
Certain items need to be added from the Excel Export Manager:
- Model Title (An Export Type of Other)
- The 3 parameter profile graph that has been user-defined as a Graph List Item (An Export Type of Graph)
With these items added, the Excel Export Manager will appear as it does below.
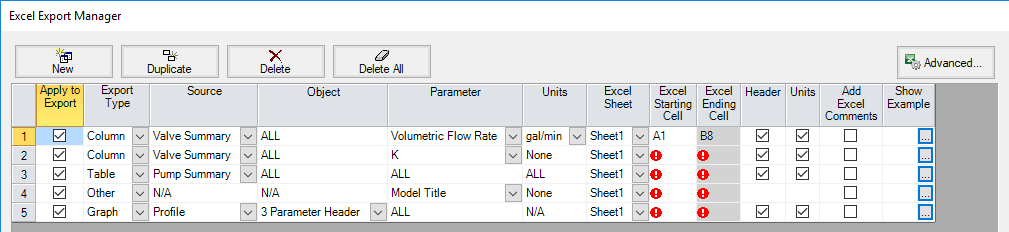
Figure 6 - Initial Export Settings for the Complex Model
We still need to add the Excel Starting Cells. The Ending Cell cannot be edited by the user - it is calculated by the Manager.
Use the preview area on the bottom of the Excel Export Manager to make sure that no export items are overlapping. Keep in mind that Graph type items are of an unknown size before export - for this reason no preview can be shown here. It is best practice to make sure there is no data below or immediately to the right of a Graph export item.
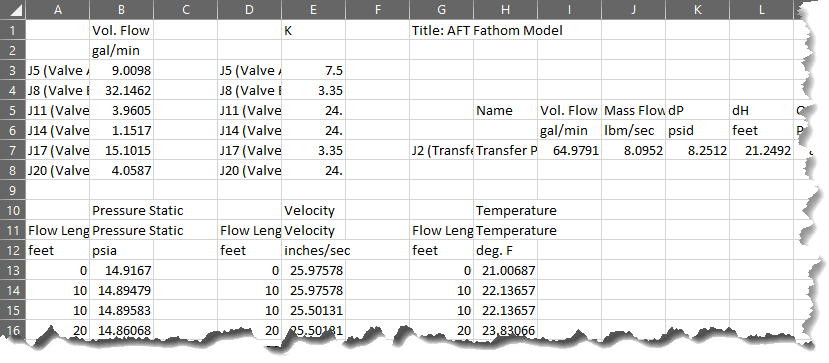
Figure 7 - First Export Attempt
We have all of the required information in Excel, but the format is not very readable, and there is a lot of extra information. The engineer will also need to set up the external calculations and an Excel Graph.
Let's try utilizing the Excel Export Manager to get some finer control over the appearance of our desired data.
- Valve Flow Rate
- Instead of including headers, using two columns for Junction Name and Volumetric Flow Rate with the Header and Unit options turned off will give us only the minimal amount of information we want.
- Turning header and unit items off can be risky, because it can be hard to tell what the value represents if the Excel Sheet is not carefully set up. For this reason, we will turn on Add Excel Comments
- K Factor
- Like Valve Flow Rate, let's turn off Header and Unit and turn on Add Excel Comments
- Pump Summary
- We want the headers and units for the summary, but we don't want so many parameters. To control what values are exported, turn off the unwanted parameters in Output Control.
- Graph
- We don't want to see these data points - we only want a graph on the main sheet - let's move it to a sheet called Header Graph. While we're add it, let's rename Sheet1 to Model Results.
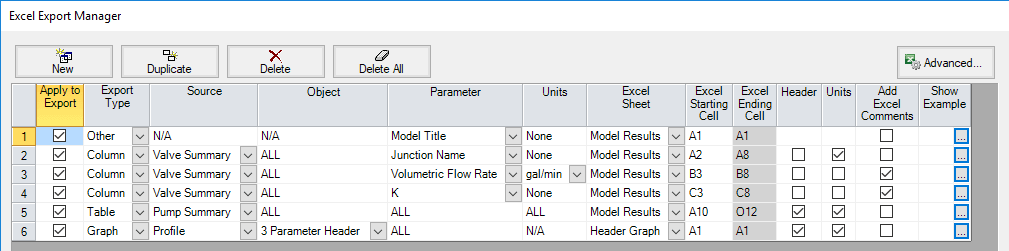
Figure 8 - New Export Settings
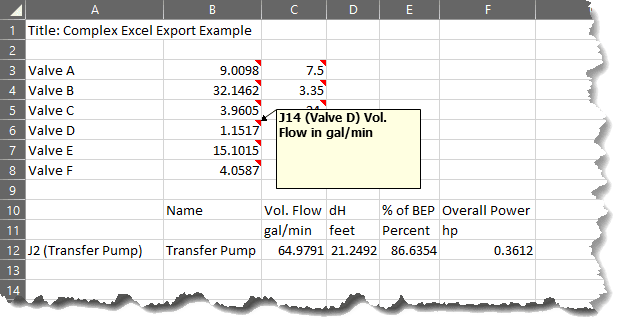
Figure 9 - New Export Result (Model Results Sheet)
We now have the data we want in a simplified format, but there is still more we can do.
One of the most powerful aspects of the Excel Export Manager is its ability to export data to an already existing Workbook. With this knowledge, we can manipulate the Excel Export Manager settings and and Excel Workbook to create a polished product that can be updated with only a few clicks from AFT Fathom 10. We can also include our external calculations in the target Workbook, letting them automatically get carried out whenever the sheet is updated.
The below Workbook was created before the AFT Fathom model was built - let's add our data to it.
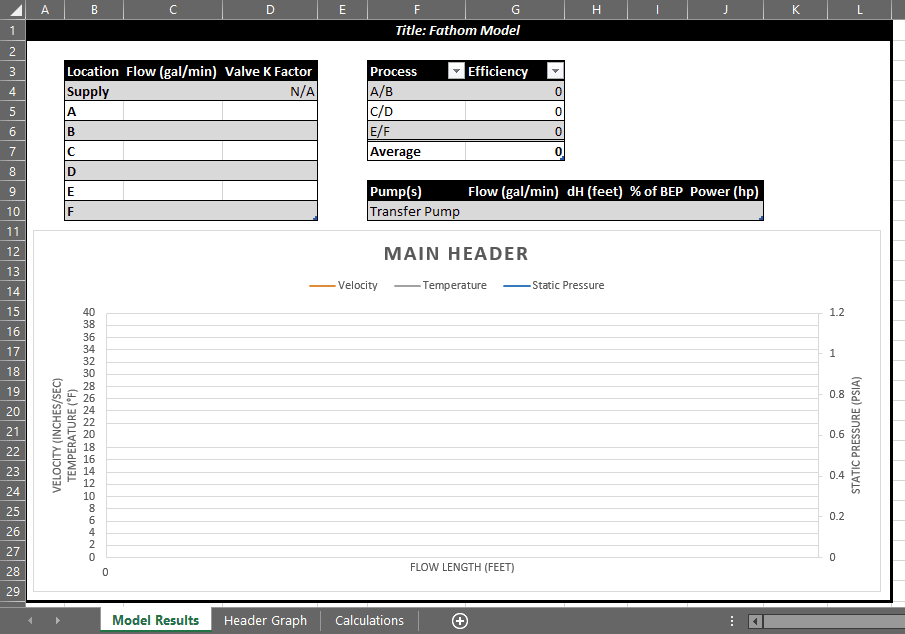
Figure 10 - An Existing Workbook
By selecting Previously Saved Workbook, turning on Automatically Export After Running Model, and making a couple of final tweaks to the settings - simply running the model will update the Previously Saved Workbook.
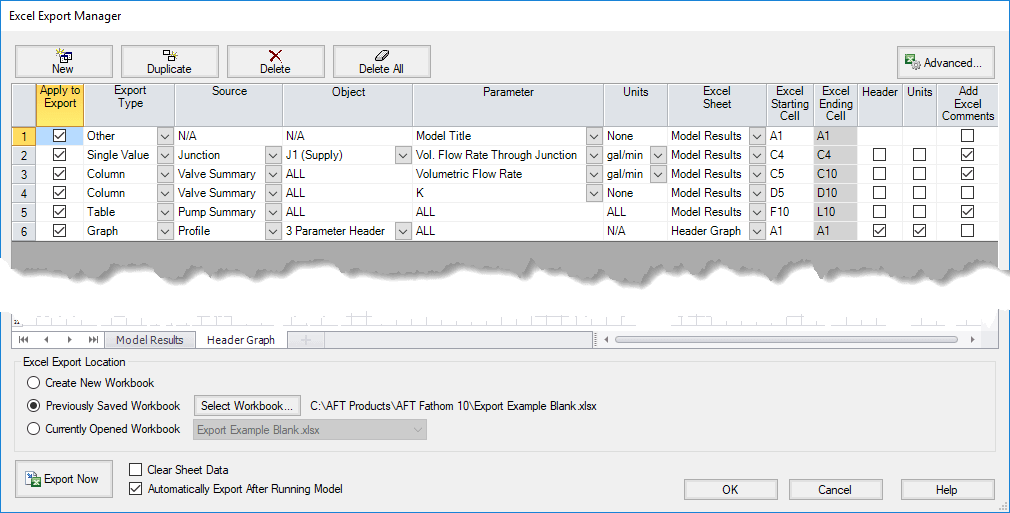
Figure 11 - Final Excel Export Manager - Note the settings in the lower left
Accepting the above changes to the Excel Export Manager and running the model changes the Workbook as seen in Figure 12 to that seen in Figure 13.
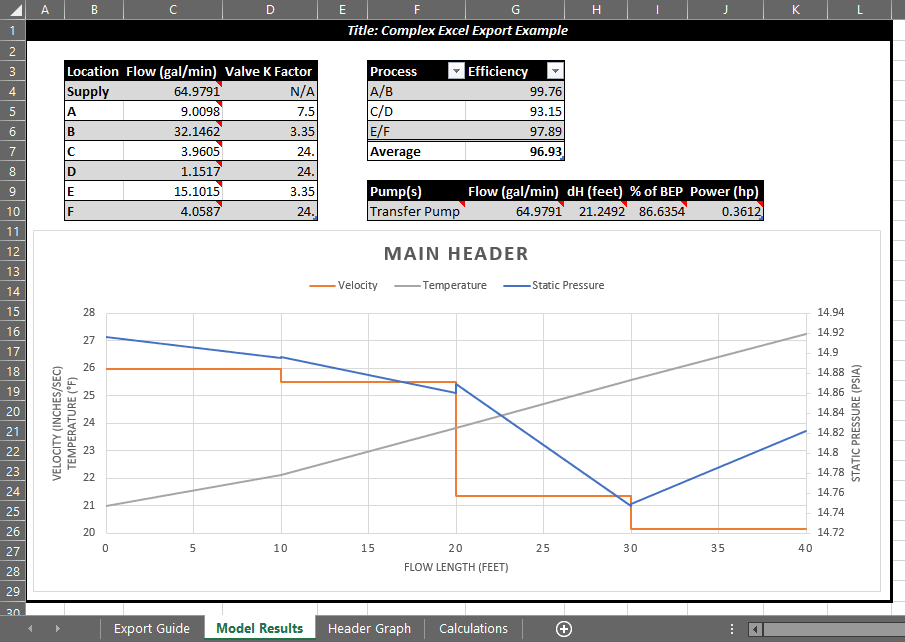
Figure 12 - Final Excel Workbook
The effect of additional changes to the model will instantly be reflected in the Excel Workbook when running the model.
This is only a small sample of what the new Excel Export Manager can do - the possibilities expand with larger and more complex models. Another powerful aspect of the tool, not covered here, is its integration with the existing batch run feature.
This integration allows you to run many scenarios and export the results to individual Excel Sheets or Workbooks with the click of a button. Spend less time managing data and more time engineering!
No video selected.